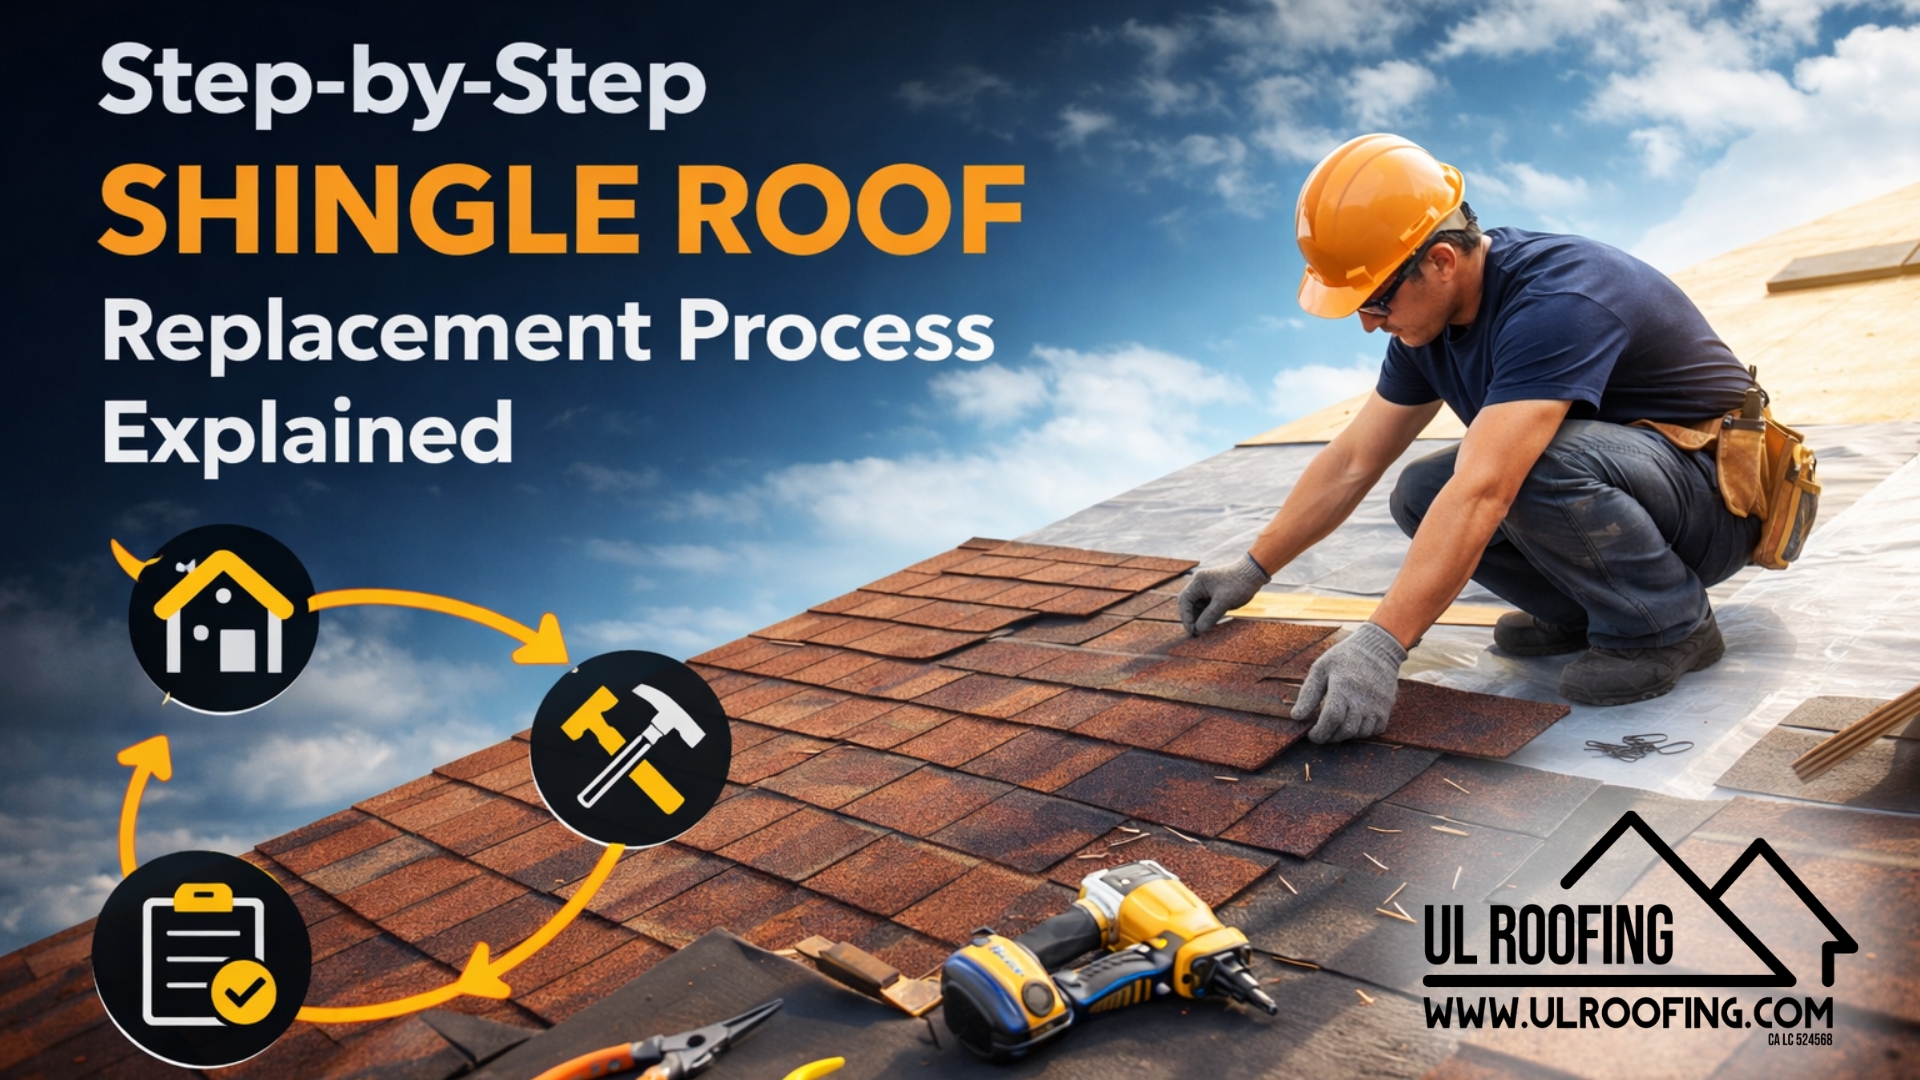
A Shingle Roof Replacement is not just about swapping old shingles with new ones—it’s a structured process that protects your home from leaks, weather damage, and long-term structural issues.
In real-world projects (especially in coastal and high-wind areas), the difference between a quick fix and a proper replacement can mean years of durability vs. recurring repairs.
If you're planning to replace roof shingles, this guide will walk you through every step clearly—so you know what to expect, what matters, and how to avoid common mistakes.
When Do You Actually Need Roof Shingle Replacement?
Before jumping into the process, it’s important to confirm whether roof shingle replacement is truly needed.
Common signs include:
- Curling, cracked, or missing shingles
- Frequent leaks or water stains inside
- Granules collecting in gutters
- Roof older than 15–25 years
- Uneven or patchy roof appearance
In many cases, homeowners delay replacing shingles on roof systems, which increases repair costs later.
Step-by-Step Shingle Roof Replacement Process
1. Roof Inspection & Planning
Every proper shingle roof replacement starts with a detailed inspection.
Professionals assess:
- Roof structure condition
- Decking strength
- Ventilation system
- Moisture damage
This step helps create an accurate estimate to replace roof shingles and prevents surprises during installation.
2. Removing Old Shingles (Tear-Off)
The old roofing material is completely removed.
Why this matters:
- Reveals hidden damage
- Prevents layering issues
- Ensures proper installation
Skipping this step (overlay roofing) may save money short-term but reduces roof lifespan.
3. Roof Deck Inspection & Repair
Once shingles are removed, the wooden base (deck) is inspected.
Repairs may include:
- Replacing rotted wood
- Fixing weak spots
- Reinforcing structural areas
A strong foundation is critical for long-lasting roof shingle replacement.
4. Installing Underlayment & Water Protection
A waterproof barrier is installed before shingles.
Key components:
- Ice & water shield (for leak-prone areas)
- Synthetic underlayment (modern 2026 standard)
This layer protects your home even if shingles fail.
5. Flashing Installation
Flashing is placed around:
- Chimneys
- Vents
- Skylights
- Roof valleys
This prevents water from entering vulnerable areas.
6. Installing New Shingles
Now comes the visible part—replacing shingles on roof surfaces.
Process includes:
- Starter shingles installation
- Proper alignment and layering
- Nailing with correct spacing
- Ridge cap installation
Modern tools and techniques (used in 2026) ensure:
- Better wind resistance
- Even placement
- Faster installation
7. Ventilation & Finishing Touches
Proper airflow is essential.
Installations may include:
- Ridge vents
- Soffit vents
Good ventilation:
- Extends roof life
- Reduces heat buildup
- Prevents moisture damage
8. Cleanup & Final Inspection
The final step ensures:
- Nails and debris are removed
- Roof is sealed properly
- Quality check is completed
Professionals verify that the shingle roof replacement meets safety and durability standards.
How Long Does It Take to Replace Roof Shingles?
Typical timelines:
- Small homes: 1–2 days
- Medium homes: 2–4 days
- Large/complex roofs: 4–7 days
Factors affecting time:
- Weather conditions
- Roof slope and design
- Structural repairs needed
Estimate to Replace Roof Shingles: What Affects Cost?
Instead of exact numbers (which vary widely), here’s what influences cost:
Key cost factors:
- Roof size (square footage)
- Type of shingles (asphalt, architectural, premium)
- Labor complexity
- Deck repair needs
- Location and weather exposure
A proper inspection always gives the most accurate estimate to replace roof shingles.
Common Mistakes to Avoid During Roof Shingle Replacement
Many homeowners unknowingly make decisions that reduce roof lifespan.
Avoid these:
- Choosing cheapest contractor without inspection
- Skipping underlayment upgrades
- Ignoring ventilation
- Installing over old shingles
- Not checking warranty details
2026 Roofing Practices You Should Know
Roofing has evolved significantly.
Modern upgrades include:
- Synthetic underlayment (stronger than felt)
- Advanced nail placement tools
- Impact-resistant shingles
- Energy-efficient roofing systems
- Drone-based roof inspections
These improvements make replacing shingles on roof systems more durable and efficient than ever before.
Expert Insight: Why Process Matters More Than Materials
In my experience, even premium shingles fail if installed incorrectly.
A properly executed shingle roof replacement process ensures:
- Longer lifespan
- Better weather resistance
- Lower maintenance costs
That’s why experienced teams—like those at UL Roofing—focus heavily on process, not just materials.
Conclusion
A successful Shingle Roof Replacement is not just about new materials—it’s about following the right process from inspection to final installation.
When done correctly, it protects your home for decades, improves efficiency, and prevents costly repairs.
If you're planning to replace roof shingles, understanding this step-by-step process helps you make informed decisions and ensures you get long-term value—not just a quick fix.
FAQs
1. How often should I replace roof shingles?
Most asphalt shingles last 20–25 years, but weather conditions can shorten lifespan.
2. Can I replace shingles instead of the whole roof?
Yes, but partial replacement works only if damage is limited and the roof is relatively new.
3. Is it okay to install new shingles over old ones?
Technically yes, but not recommended—it reduces durability and hides structural issues.
4. What is the best time for roof shingle replacement?
Spring, summer, and early fall offer ideal conditions due to stable weather.
5. How do I know if my roof deck is damaged?
Signs include sagging areas, leaks, or soft spots when walking on the roof.
6. Does replacing shingles improve home value?
Yes, a new roof improves curb appeal, safety, and resale value.

.png)